Tuesday, December 8, 2009

Let It Snow!


"Oh, the weather outside is frightful,

But the fire is so delightful!


And since we've no place to go,


Let it snow! Let it snow! Let it snow!"


Are you getting any snow today?

Here in the Chicago area we're supposed to be getting several inches!

The girls were very excited, till it came time to bundle up before leaving the house for school. Then our living room turned into a 3-ring circus!


Someone stepped in a wet puddle left over from yesterday's melted snow by their boots and had to change socks. Then another child came to me looking like the Stay-Puft Marshmallow Man, complaining that she couldn't snap the hard snaps on her coat nor could she put on her hat with her fat gloves on. After getting on dry socks from the "puddle in the house" incident, my youngest was crying because her pinky finger wouldn't fit inside her new gloves. Sure enough, it was sewn wrong inside & I've got to order another pair!

My little Southerners had better get used to winter again in the Midwest!
:)
LOL!!!


After dropping the girls off at school this morning, I drove around snapping a few wintry pictures!


The first picture is from the Christmas decorations in my girls' bedroom. It totally reminds me of them! One with reddish hair, and one with blonde!
I love this! It looks so vingage-y and cute!!

And the picture below is a sneek peek of my kitchen decorations
(which you'll get to see very, very soon!),
based around a:
"Mrs. Claus's Sweet Shoppe"
theme!

Till next time....

Let it Snow! Let it Snow! Let it Snow!

Monday, December 7, 2009

O Christmas Tree


O Christmas Tree! O Christmas Tree!

Thy leaves are so unchanging;
O Christmas Tree! O Christmas Tree!
Thy leaves are so unchanging;
Not only green when summer's here,
But also when 'tis cold and drear.
O Christmas Tree! O Christmas Tree!
Thy leaves are so unchanging!

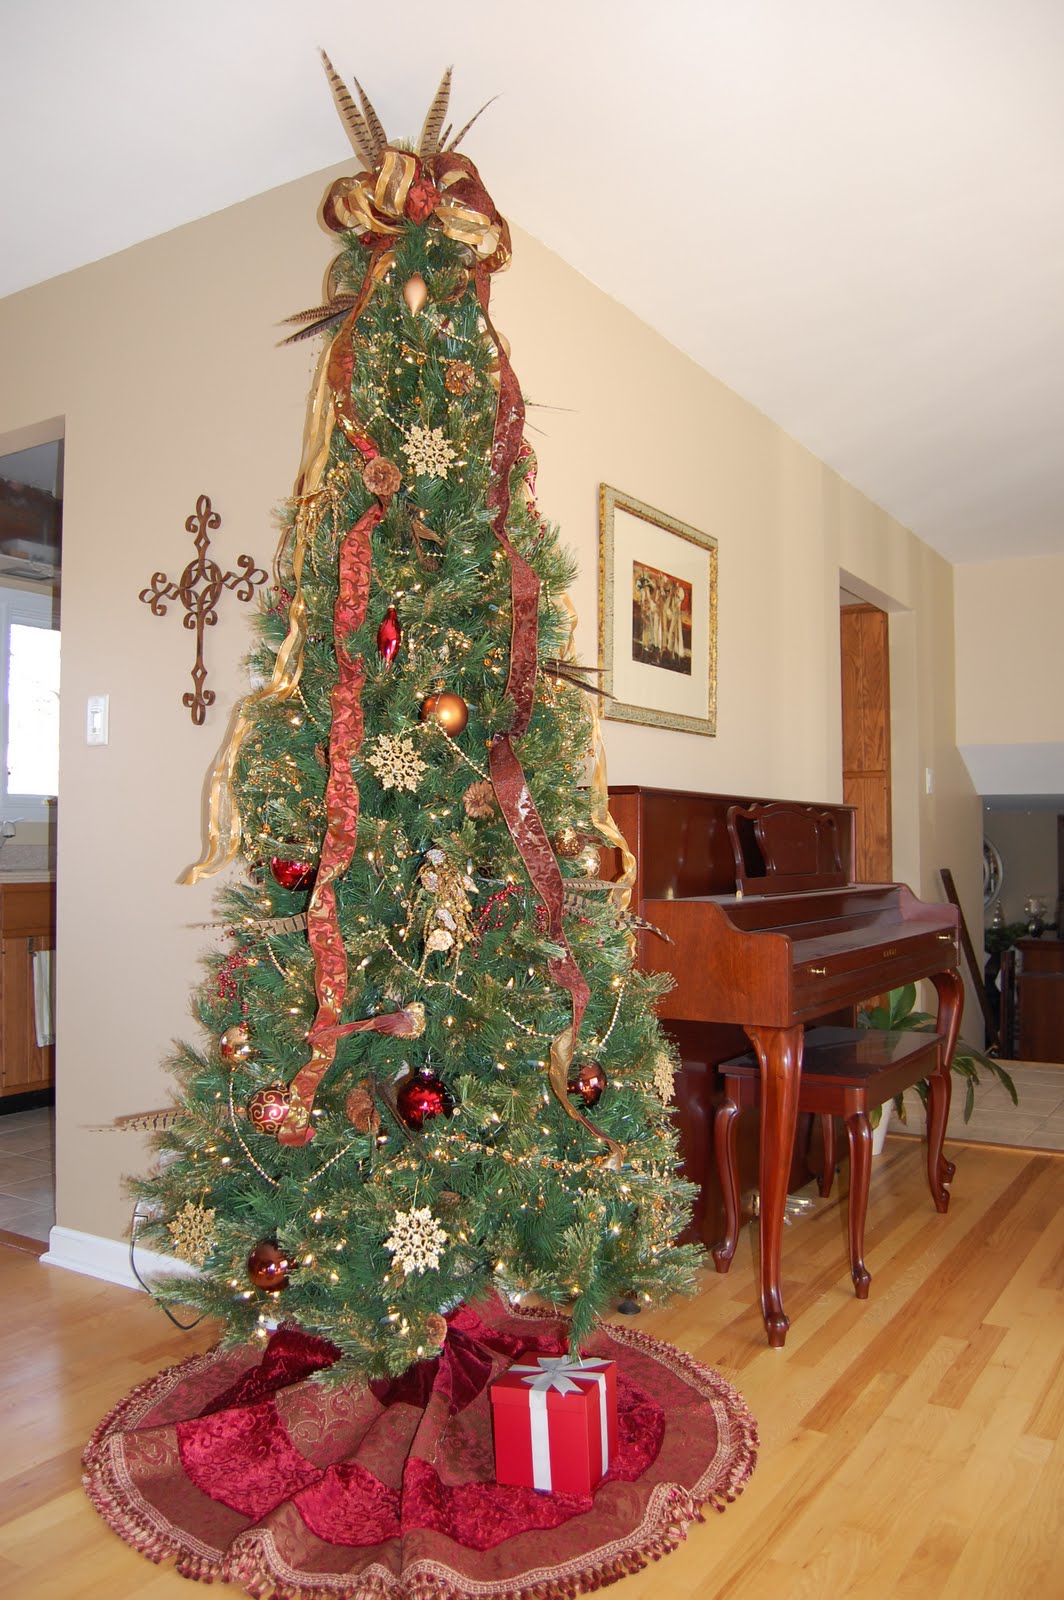
Welcome! I'd love to show you my living room tree, one of 4 in my home here at The Blessed Nest!

I am totally in love with the look of this tree! I've decorated our more "formal" tree in the living room this way for the past 3 years.

The inspiration for this tree came from my love of birds (of course!) and from all of the real pheasant feathers I've collected from my shooting trips with my Dad over the past few years.

Just because you have a "theme" to your tree doesn't mean there can't be plenty of your own personality and family memories added to it! The more of "you" that you put into your decorating and your home, the better, I say! :)


This tree is filled with warm reds, champagne-y golds, and rich browns and ambers.
Wired ribbon cascades down the tree, and pinecones, pheasant feathers, glittered leaves and berries, and little glittered birds peek from the branches.


I love birds! Watching them, preparing homes in my yard for them to build nests and lay their little colorful eggs, learning about the different species, I love it all! What beautiful creatures!

Since I decorate with birds & nests throughout the year, it was only natural to have a few on my Christmas tree!


Our Christmas tree in this room is directly centered across from a large bay window on the front of the house. I love to leave the curtains open in the evening so that neighbors driving by can see the pretty tree lights inside, looking all Christmas-cozy!


I added matching leftover ribbon to my lamps on the entry table too.
Simple & festive!

O Christmas Tree! O Christmas Tree!
How richly God has decked thee!
O Christmas Tree! O Christmas Tree!
How richly God has decked thee!
Thou bidst us true and faithfu
l be,
And trust in God unchangingly.
O Christmas Tree! O Christmas Tree!
How richly God has decked thee!


I can't wait to show you all the rest of our little cozy home all dressed up for Christmas!
My favorite spot has to be our little kitchen, with a "Mrs. Claus's Sweet Shoppe" theme! My girls just LOVE that, let me tell you!! LOL!

Till next time, my friends.....

Thursday, December 3, 2009

Easy-Peasy, Just-Looks-Like-A-Million-Bucks, Use-What-You-Have Garland!

This Christmas season I decided to decorate using things I already had.
Which, since we're living in a new house now, meant that I had to get creative and use old things in new ways!

That's just what I did when I made this garland below:

{wanna know how I did it & how you can make one too? keep reading!}

Looks all "fancy" now, doesn't it? I honestly can't believe how simple this was to do! It only took about 15 minutes to make! I knew I had to share this with you!!!

Well, this garland used to be a plain ol' thing that draped along our staircase banister.
Cute, but a bit "blah".

Since I now live in a split-level house, the stair banisters aren't nearly as long and wouldn't work well for garland. So I looked for a new spot for it, and....
....up on top of the bookshelves it went!
So....

Step 1: Find a great place for your garland!


Step 2: Next, gather up some things you already own:

ribbon
ornaments
pinecones
lights (if your garland isn't pre-lit)
something to attach the ornaments to the garland
(like floral wire, or green pipe cleaners, or if you're lazy like me: long wire ornament hooks)
something to fill it out a bit (feathers, branches, more fake greenery, decorative sprays...)

Now you're ready to get started "fluffing" your garland!


Step 3: If your garland is not pre-lit, go ahead and add lights to it now.....
....it's OK, we'll wait for you....
:)

Ready?

Time to make our super easy bow!
This is easiest if you have a long length of ribbon.

Starting near the middle of the ribbon start to loop it around several times.
Kind of like when you wind up a garden hose, or if you were a cowboy gathering up your rope!
LOL!!!
Do it several times until you'll have 3 "loops" for each side of your finished bow.
You should have 2 "tails", one on each side of your bow.
Try to work your "loop" so that the "tails" are similar length.
But don't stress too much about it, it's gonna get tucked around anyway!

Next, take a short piece of the same ribbon and wrap it around the center of your "loops", tying in a little knot in the back side of the "loops". This will make your bow look like it is tied.
Be sure to leave the ends of this knot a little long, don't clip them!

Go ahead and fluff out your bow!


Step 4: Attach the bow to the garland.

Take the ends of your bows' knot and use them to attach the bow to your garland. Just knot it around the garland, then fluff the greenery around your knot a bit. No one will see!

Next, gently wind the ribbon "tails" about the greenery, play with it till it looks good to your eye. I added little fake ribbon loops by just making one little loop and using scotch tape to secure it. That's what I had on hand! A little florist's wire or even a garbage bag tie would work too!

Step 5: Attach ornaments to the garland.

Gather some small leftover ball ornaments together into groups of 3.
Using your floral wire or a green pipe cleaner, string a group of ornaments on, then twist the wire together by the ornaments to secure them on.
Add the ornaments to the garland by twisting the wire securely around several branches of greenery.

I added ornament groupings by my bow, near my "loops" of ribbon, and toward the end of my garland.


Step 5: Add in the pretty fillers!

I used pheasant feathers and pinecones to "fill in" my garland in a few spots and make it extra fluffy-full and pretty!

Use what you like. Maybe something that coordinates with your tree!
Feel free to adjust things around until you're satisfied with the look of your garland!

That's it!

Plug in the lights and enjoy it!


Now you know how to get an expensive, designer-store looking garland on a Use-What-You-Have budget!

How are you using what you have this year?

Tuesday, December 1, 2009

First Things First on Dec.1st

This Christmas season is a bit different for many of us this year.

{our living room Christmas tree}

We are scaling back, cutting our budgets for purchasing gifts, and using what we already have to decorate. Oh, we still want to have plenty of Christmas Cheer and make lots of fun family memories! However, the economic downturn is making a difference in how we celebrate Christmas.

But this bad economy has, believe it or not, given us a blessing! Yes! A wonderful thing has happened. Whether by choice or circumstance, our hearts are changing as a nation!

We have declared that It's Time to Put First Things First!!!
We are longing for the True Reason of the Season to be celebrated, and placed First in our hearts and lives!


So, today I'd like to share with you our most special family Christmas tradition:

"The Jesus Gift"


The "Jesus Gift" in our family is something that lets us keep Christ as the main focus of the CHRISTmas season!

A simple box is placed under the tree
(I found this one at Target this year! It looks like a wrapped gift, but the lid lifts off easily!)
that will hold our "heart gifts" to Jesus to Celebrate His GIFT to us -- coming to earth to be our Savior!

Throughout December family members can place things inside the box.

Some examples of things that your family could include would be:

A Child's Drawing
A Letter to God
A Heart Commitment (reading your Bible regularly, for example, to spend time with God)
Pictures of Items Donated to those In Need
Name of an Organization You Will Help
Name of a Person Your Family Will Commit to Pray For for 2010

Then, on Christmas morning, be sure to Keep First Things First, and open The Jesus Gift together as you start your morning festivities!

This is not something that is done to say "how great are we?!". But something done quietly and prayerfully as a family so that you remember the reason for the celebrating!!


This Christmas, let's remember the real
Reason for the Season!


Share with us all in the comments below how your family Keeps First Things First for Christmas!

Thursday, October 15, 2009

Coming Soon....


Y'all are so great, thanks for giving me some time to get "settled in" to our new home! I really needed this little bloggy break. It gave me a chance to focus on my family and our new life here in Chicago-land!

I've been really busy, and can't wait to share more Home and Heart Inspiration with you here again at The Blessed Nest!!!

Coming Soon:

My upstairs landing "after" pics

More Master Makeover improvements

Inspiration from my Heart to Yours

Comfy-Cozy Autumn Recipes

My kids' Arts-N-Crafts table "after"

Simple Fall Decorating

Getting Organized for the Holidays

Giveaways

....and more!!!


Can't wait to visit with you, dear friends, again soon!

Many Blessings to You :),

Stacey